How Do I Upgrade My Retrace Trial to a Paid Account?
- 1 Minute to read
- Print
- DarkLight
- PDF
How Do I Upgrade My Retrace Trial to a Paid Account?
- 1 Minute to read
- Print
- DarkLight
- PDF
Article Summary
Share feedback
Thanks for sharing your feedback!
Upgrading from a trial to a Paid Account within Retrace is an easy process.
Simply click the 'Upgrade Now' button directly under the top navigation.
This will take you to a page called "Manage Subscription" where you can select a number of different options related to your account:
- Retrace Tiers: These are 4 price points that provide a different number of host hours that can be selected:
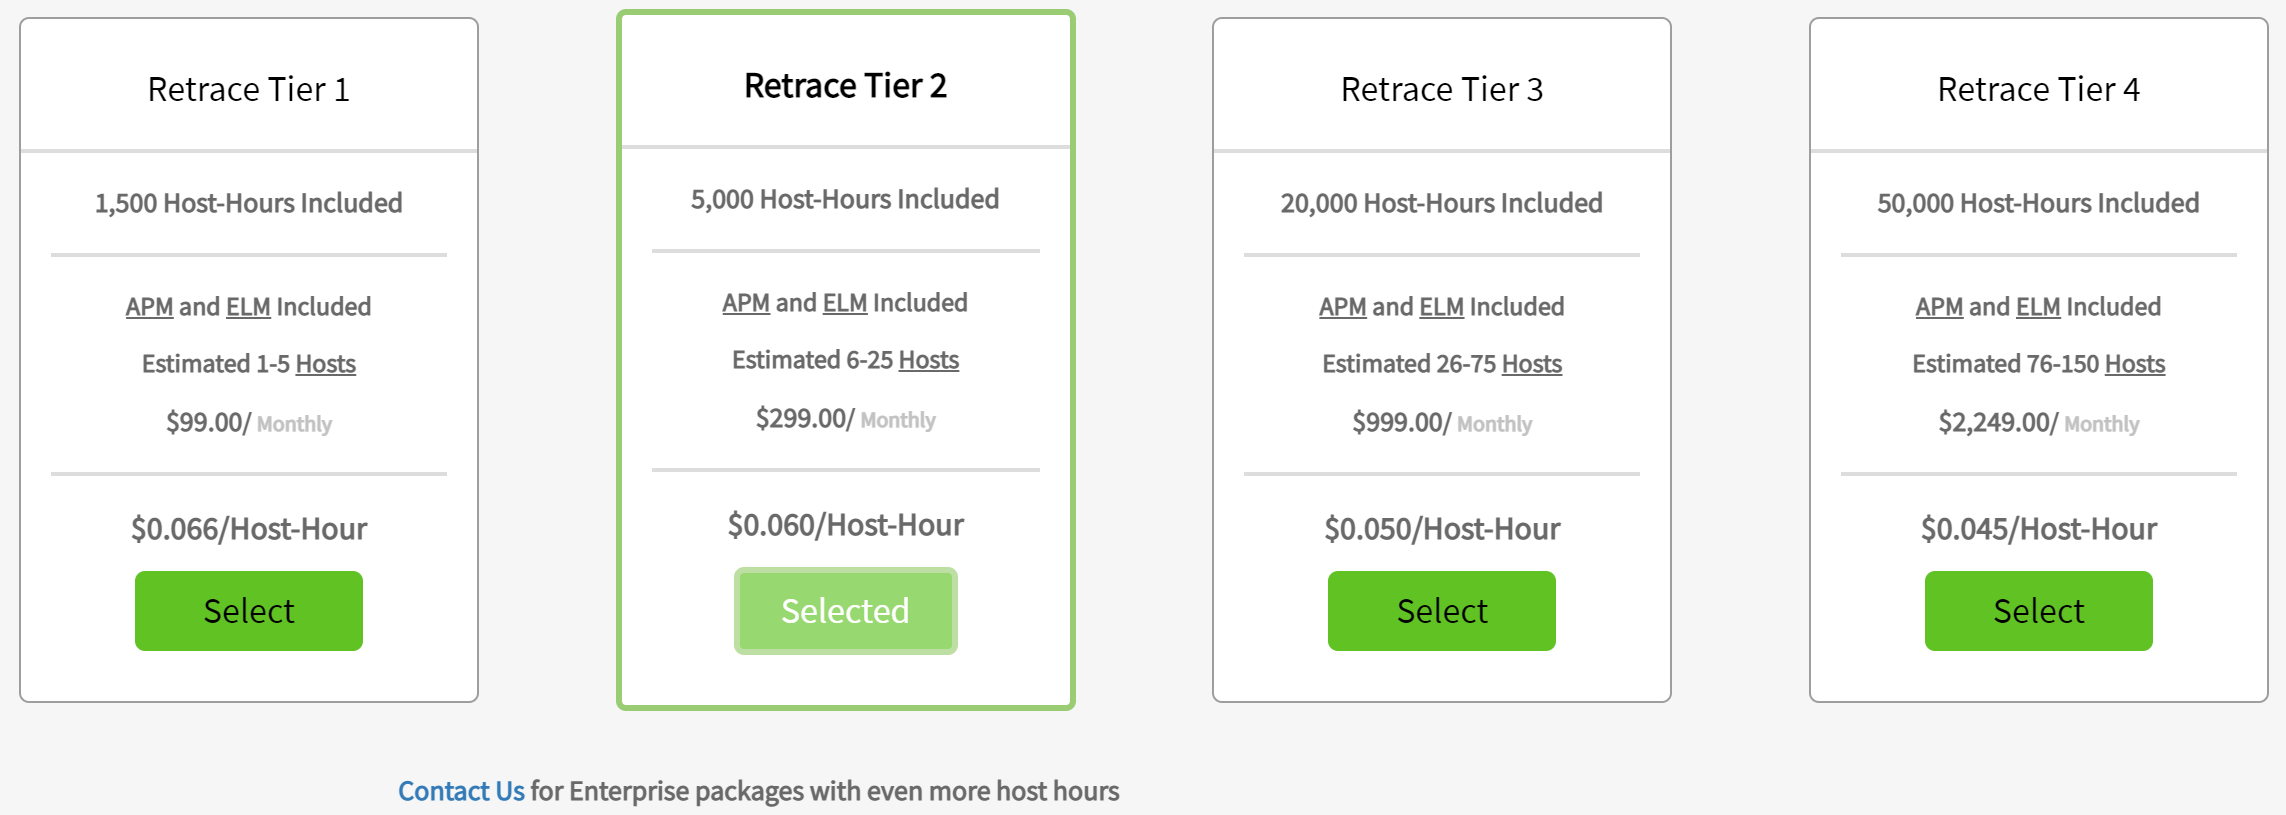

Both monthly and annual options are available to select.
Enterprise Tiers are also available through contacting sales@stackify.com . For additional questions about how Retrace Pricing works, please visit http://stackify.com/pricing.
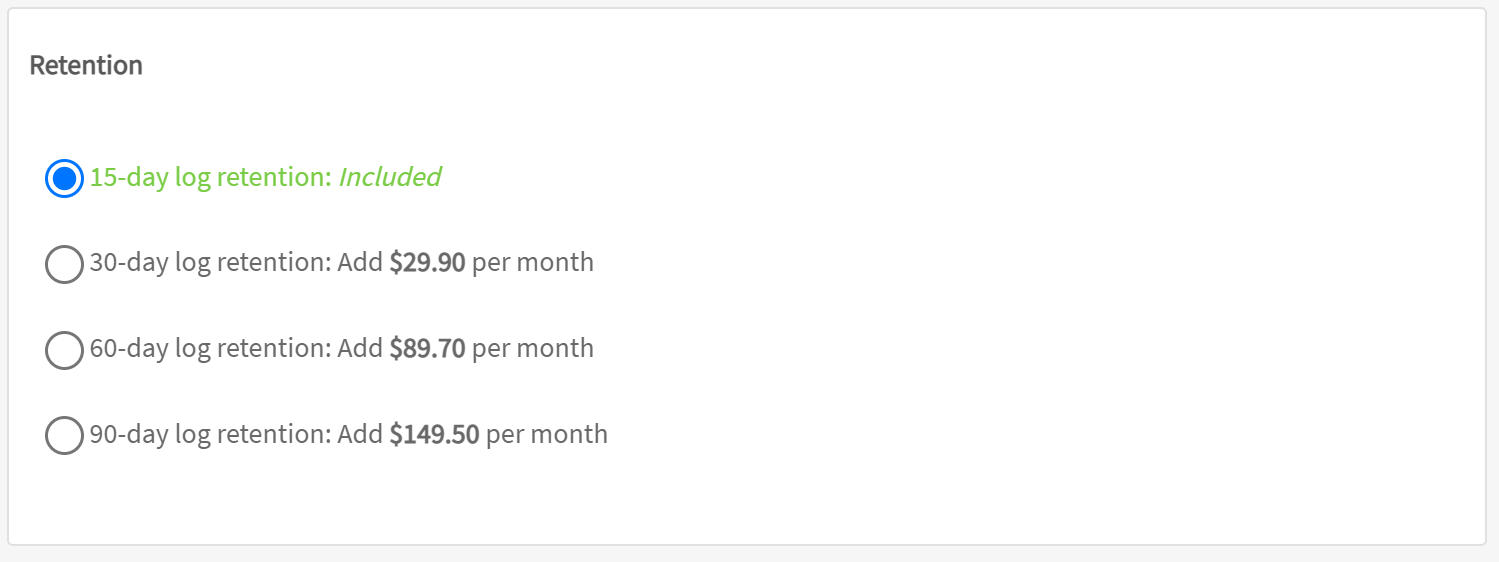
Retention options: These are options that define how long logs are retained in the Retrace portal:
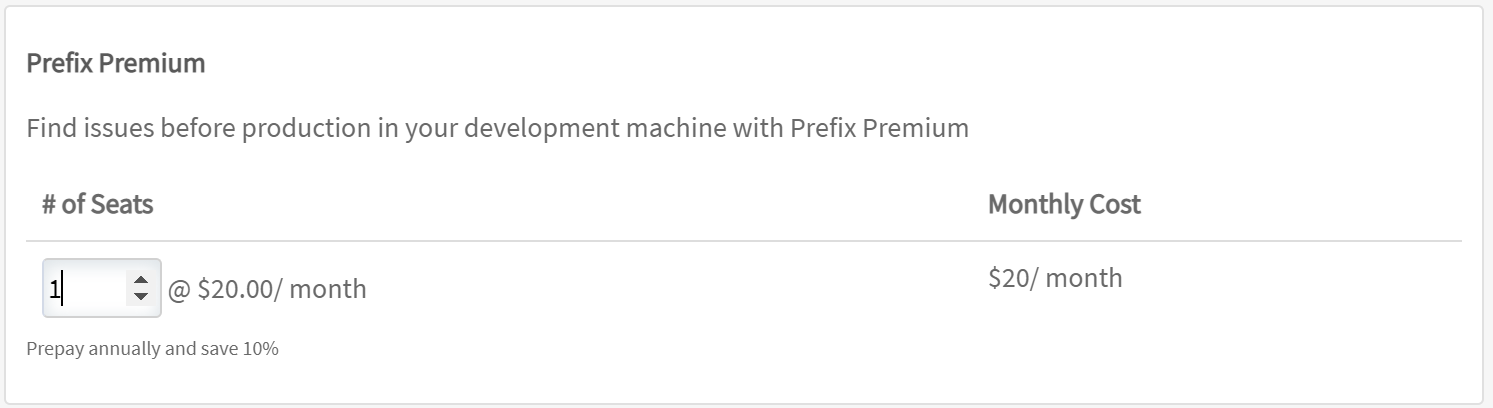
Prefix Premium Licenses can be added as a part of a Retrace subscription as well:


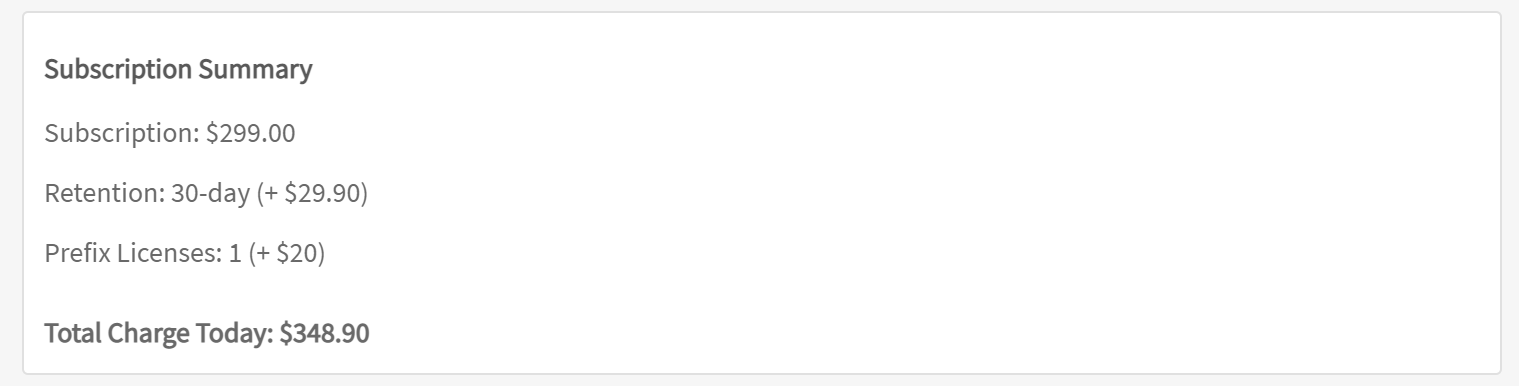
A Subscription Summary section will show below to confirm the selections made:
After making the tier, log retention, and Prefix Premium license selection, the process is straightforward - just click through a couple of screens and provide credit card details. Once that's complete, you're finished converting your Trial account to a full-fledged Paid account. Thanks for becoming a Retrace customer!
How Can Someone Else in my Organization Upgrade My Account?
Most of the time, the user who signed up for the Trial will also be the one to set up payment for the paid Stackify account. Occasionally, however, a client will ask us how to enable someone else within their organization to submit the payment information on their behalf. Here is a quick how-to on inviting a user to be able to modify billing and payment information.
Inviting the User
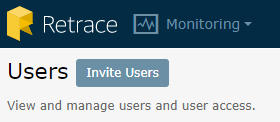
First, you will need to click on "Invite Users" within the Setting -> Users page of the Retrace portal.
Assign the Built-In Role
Here you will enter the email address and assign any relevant Notification groups for the user. Once completed, scroll down to the Permissions section.
Once in the Edit Permissions screen, simply enable the Billing permission role so that the user will have access to the account's Billing-related screens.
Once the user's new account has been set up, have them sign in and go to the Billing Page of the Settings tab. From that point the upgrade process is the same.
Was this article helpful?