Get Started With Retrace
- 3 Minutes to read
- Print
- DarkLight
- PDF
Get Started With Retrace
- 3 Minutes to read
- Print
- DarkLight
- PDF
Article Summary
Share feedback
Thanks for sharing your feedback!
The Retrace getting started guide will point you to the resources you’ll need to install, set up and start utilizing your account.
Our goal is to help your team go from a few servers and users to a full roll-out and widespread adoption.
Step 1. Retrace Installation
Retrace offers many basic and advanced features for your .NET, Java, PHP, Node.js, Ruby, and Python applications. To get started, install the Retrace monitoring agent on your server:
- .NET APM Setup Guide
- Java APM Setup Guide
- PHP APM Setup Guide
- Node.js APM Setup Guide
- Ruby APM Setup Guide
- Python APM Setup Guide
Automating Your Retrace Installation
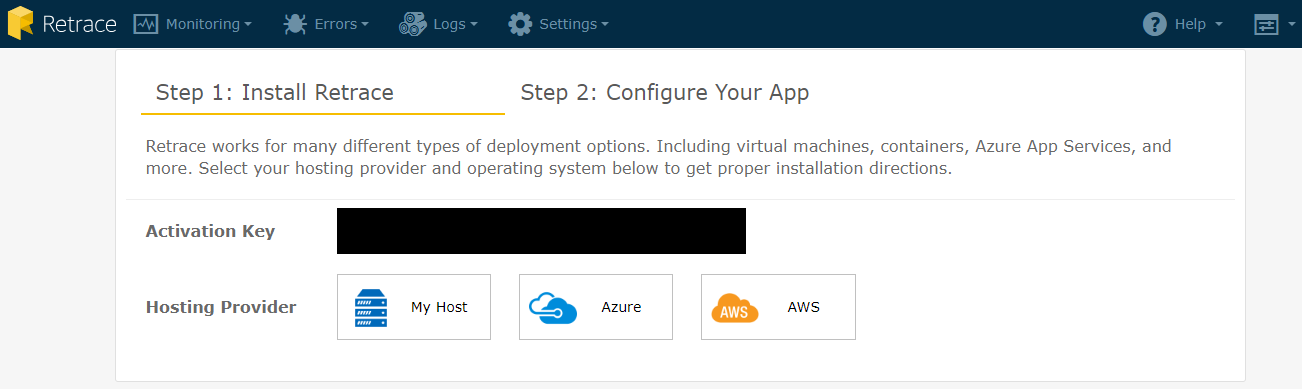
How you install Retrace will vary depending on your programming language, type of deployment and hosting provider. Here are our integrations for easier deployment and scaling:
- Azure
- Amazon Web Services
- Managing Your Own Instances
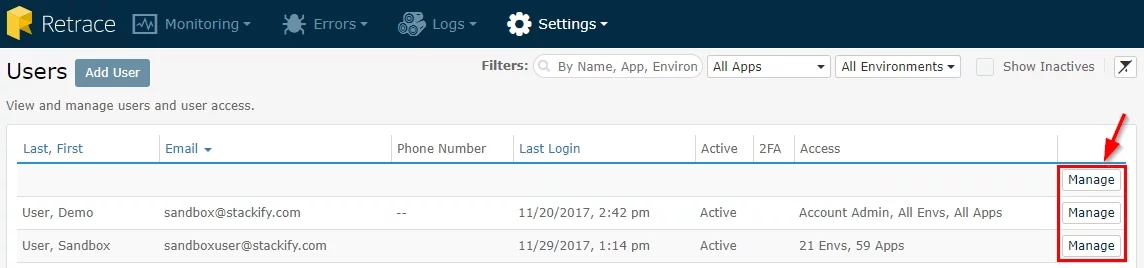
Step 2. User Account Setup
Add Users and Set Permissions
Involving several people from your team gives added visibility into your applications. Additionally, role-based permissions help you manage access for various teams. To setup users & permissions start here.
Stackify Pro Tip: setup your apps and environment first, then add teams and set their permissions, then add users to those roles… in that order.
Configure Authorization Options
Step 3. Customize Your Retrace Account
Customize Logging
Retrace's centralized logging supports sending your application logs from common logging frameworks.
Custom Logging in Retrace allows you to pull in structured logs from your application that can show important details about point-in-time behavior and execution within your code. Have you ever wanted to see a custom field (logged in user, client ID, etc.) when looking through logs?

These documents will explain how to pull in your logs and guide you on how to add structured logging to your code.
Customize APM
There are a few different customization options for performance profiling. Refer to these guides when you see Untracked Application Code, or if you’re trying to track performance in a .NET or Java Service rather than a web app.

- .NET Performance Profiling
- Java Performance Profiling
- PHP Performance Profiling
- Node.js Performance Profiling
- Ruby Performance Profiling
- Python Performance Profiling
Custom Dashboards
Custom Dashboards allow you to add and arrange widgets displaying anything from Error and Log monitors to Active alerts. At a quick glance, you can see what areas in your account need attention and dive in from the dashboard.
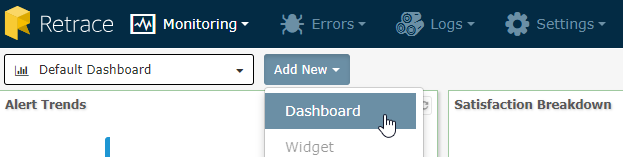
You can also make a dashboard public to share out or display on a screen within your office for full team visibility.
Integrations
- ALM and Task Tracking
- Axosoft - export errors reported by Stackify into Axosoft’s issue management software for tracking
- Visual Studio Team Services - push logging exceptions from Stackify into the Windows Team Foundation Server
- Jira - push logging exceptions from Stackify into Jira work items
- Slack - incoming Stackify alerts in the Slack app
- Deployment Tracking
- Retrace provides a simple HTTP API for tracking deployments. We have created recipes or plug-ins for some of the most popular deployment tools like Bamboo, TeamCity, Octopus Deploy, and more.

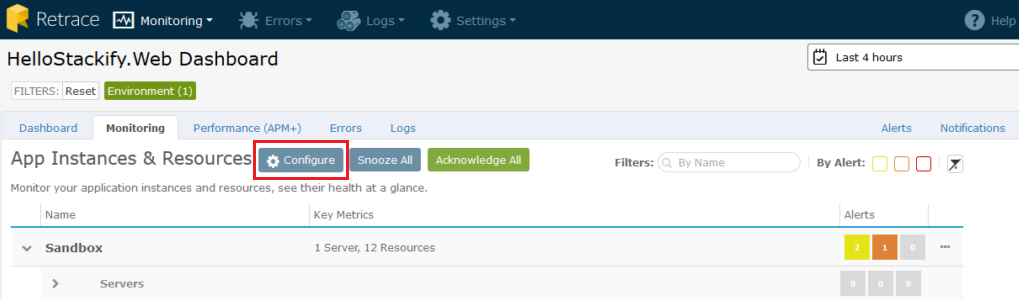
Step 4. Monitors, Alerts & Notifications
Monitors and Monitor Configuration
The first step to identifying issues within your Apps, Servers/Roles/VMs or other Resources is to configure Monitors to track behavior and health. With monitors in place, Retrace can highlight issues to help you prevent the impact on your business or customers.
- Set Thresholds, Ranges, and Waiting Periods
- App Monitors
- Server Monitors
- For other resource monitors not listed in our docs site, we have best practices that we’re happy to share. Reach out to our support team for more info.
Alerts
Setting Alerts gives Retrace the ability to show where something has gone outside of a threshold you set. You can control how your Alerts behave, and how you interact with them (i.e. Snooze or Acknowledge) can direct their future behavior. You can also set Maintenance Windows to determine how Alerts and Notifications behave while you’re performing updates.
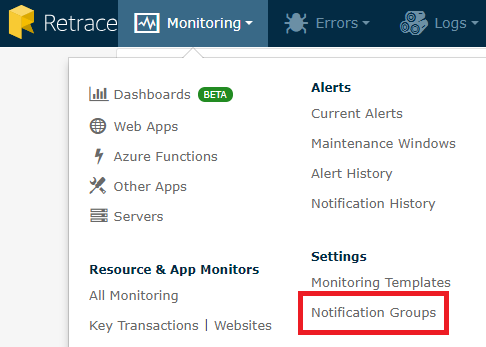
Notifications
Notification Groups define a set of individuals who receive emails or SMS messages when an Alert triggers. To ensure only the people who need to be notified of an Alert are contacted, you can specify groups, have individuals in more than one group, and customize them to your specific needs.
As you continue to get familiar with your account and have questions, don't hesitate to reach out to our support team.
They are all developers themselves and happy to help!
Was this article helpful?